
Brooder Kit with Thermostat
Additional information
$110.00
Some of our products are bulky and/or unusual shapes for postage. Delivery costs will depend on the product ordered, the combination of products and the delivery area. Delivery costs will appear when items are placed in your shopping cart and the delivery address is entered. If you have any questions at all, please contact us directly on sale@madees.com.au
Shipments and returns
Goods are shipped via Australia Post or our nominated courier (depending on the size & quantity of the goods).
Shipping fees include handling and packing fees as well as postage costs.
Please inspect your goods immediately upon delivery and report any damaged or missing items to us immediately.
Returns
Change of mind / no longer needed / found cheaper alternatives else returns
We want you to love the products you buy from Madee’s. If you change your mind, you may return the product to us within 30 days of the date you received it and we will issue you with a store credit. Where exceptions apply, customers are notified on the product display page. Note, change of mind returns are different to returning a product under the Australian Consumer Law or CGA if the product is faulty.
For returns due to a change of mind / no longer needed / found cheaper alternatives else return, you will be responsible for all associated shipping and handling costs, including any applicable taxes or duties. This applies regardless of any free, discounted, or promotional shipping offer that may have been included with your original order.
This includes:
- The original shipping cost we incurred to send the product to you (e.g., if you paid $35 for shipping, this amount will not be refunded).
- The cost of returning the item to us, which you must cover.
- A restocking fee of 5% of the original purchase price, which helps cover the expenses related to handling and repacking the returned product.
Products returned for change of mind reasons must be in ‘as-new’ condition and packaged securely in the original packaging. This means you have not used, assembled, damaged, washed or laundered any of the products.
Product Details
Brooder Box is not included. If you would like to make one you can have idea from 1000s of DIY brooders of google and youtube.
Raising chicks is infinitely easier than incubating eggs, but there is still much more to it than just plopping them in a coop. They need a toasty-warm mini-coop – a brooder – to nurture them into toddlerhood. If they had a mother of their own, the chicks would crowd under her feathers at night for warmth. There are many ways to build a brooder, but they all have to fulfill the basic needs of an orphan chick for the first six weeks of its life: food, water, warmth and protection.
Many people raise chicks in a cardboard box. Play pens, kiddie pools, rabbit hutches, aquariums, plastic totes and other items likely to be found in a garage or barn will suffice. You can build a custom built brooder as big as you want, but the general rule of thumb is to provide at least one square foot of space per chick. For the first few weeks a small fraction of that space is fine, so one option is to start small and add on later. Whatever type of brooder you make, it needs to be out of the elements so the chicks are warm, dry and safe from nighttime predators. A barn, garage or your living room are all fine options. You can also place the brooder inside the chicks’ future home – the coop.
If you intend to raise too many chicks the best option is to make a brooder which you can easily move. For first few weeks when chicks are tiny and vulnerable you can keep it inside garage or barn and as chicks start growing in size and need more place you can shift it to coop, where during the day time chicks can move around and come back to heat source when it gets cold. With this kit your options are unlimited.
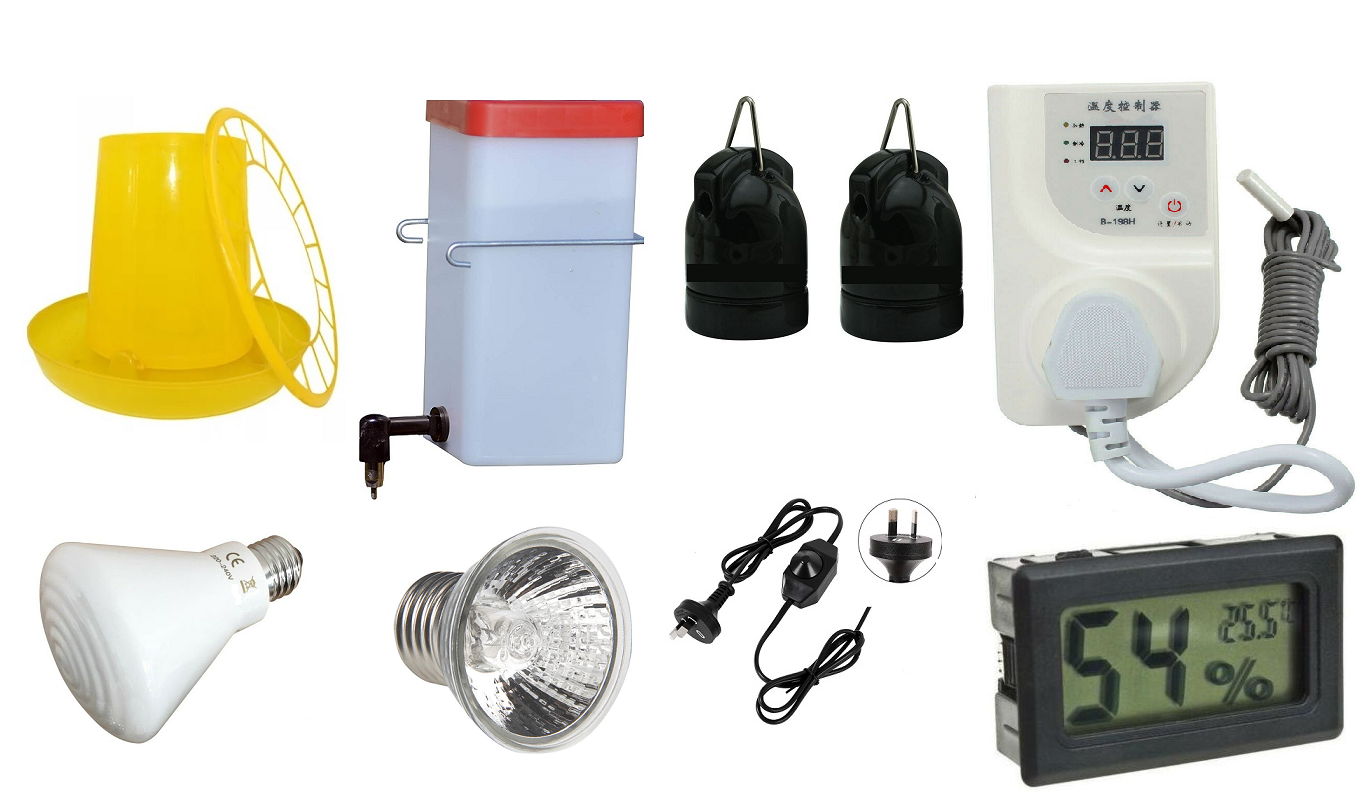
This KIT includes all parts you will need for making your own brooder. You can maintain the desired temperature with the help of thermostat. The uvA+uvB bulb provides the heat and light which is essential for growth of chicks , the ceramic heat lamp keeps the brooder warm so that chicks are comfortable. The digital thermo meter displays the temperature inside brooder to ensure it is operating at desired level of temperature. The chords with dimmers switch enable you to have full control both on light and heat. The feeder and drinker will provide much needed food and water. This kit enables you to have a fully functional brooder at the fraction of cost of factory made brooder which may not be big enough for number of chicks you want to raise.
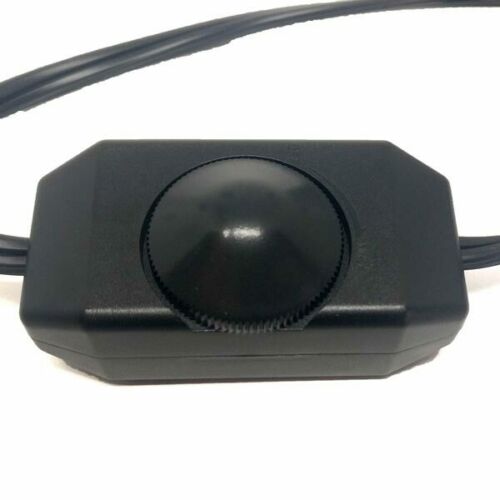
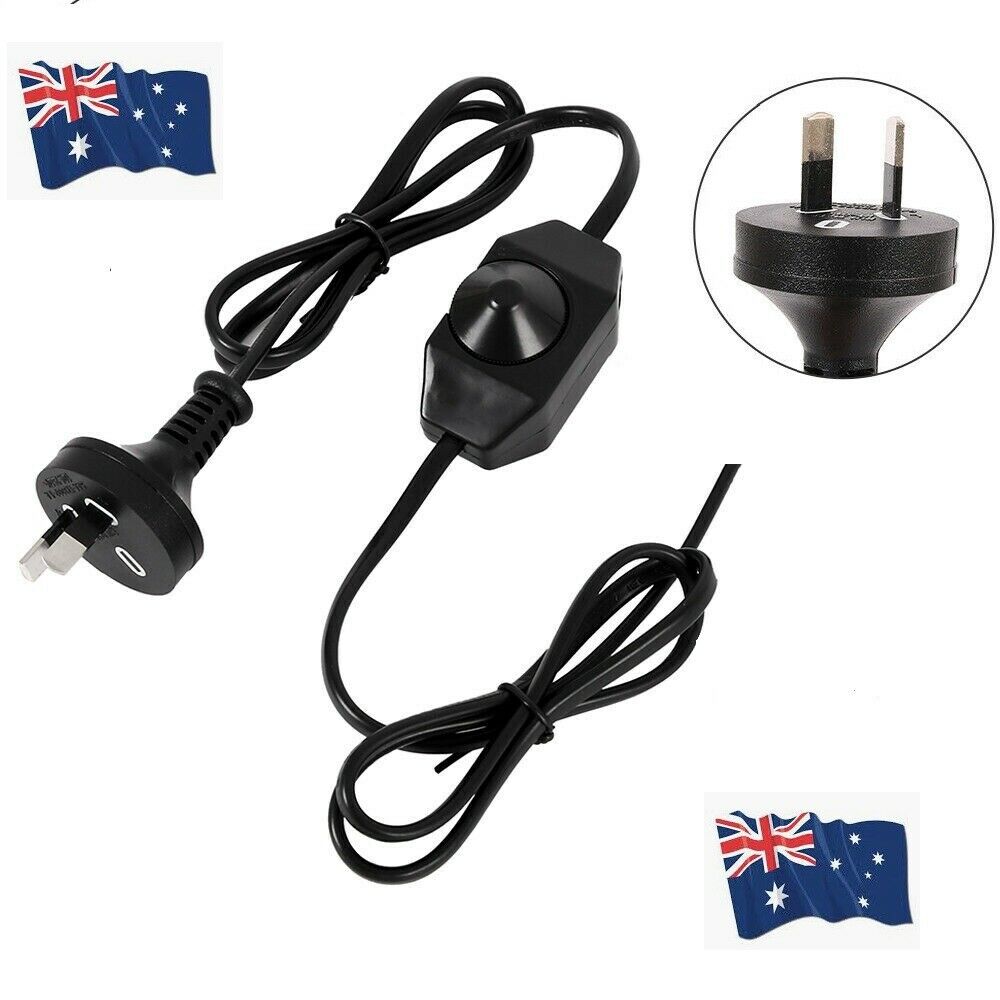
1) Dimmer Chord and Bulb holder: 1.8 metre long cable fitted with Au Plug, a rotary dimmer switch and E27 heat resistant ceramic bulb holder fitted with brackets for easy installation.
Dimmer switch gives you full control over the light and temperature inside the brooder. If reading on thermometer indicates more then desired temperature inside the brooder you can adjust the switch to decrease temperature and vice versa. The chord is fitted with SSA / CE approved ceramic E27 bulb holder. The ceramic bulb holder is heat resistant and can with stand high temperatures. Though 75 watt bulb does not generate much heat. This chord is suitable for bulbs / heating lamps up to 150 watts only. Do not use with the higher wattage bulbs/ heating lamps.
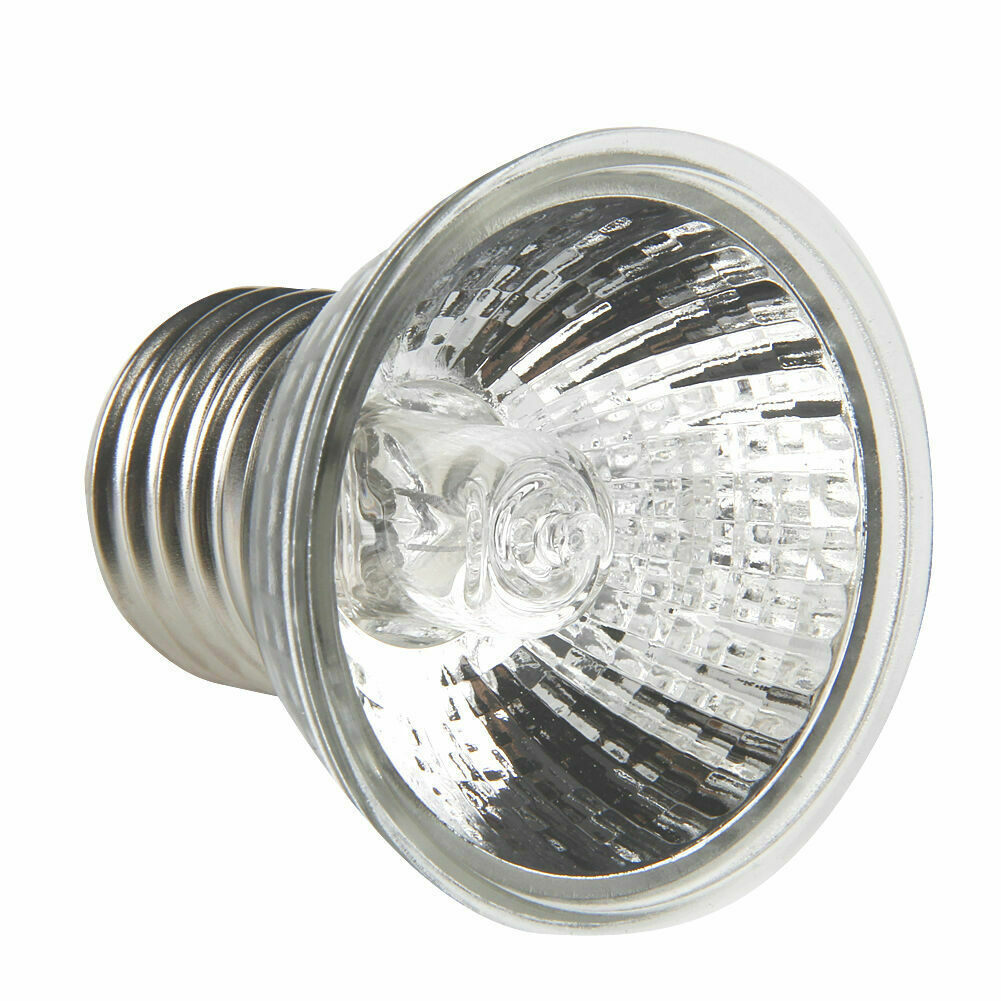
2) 75 watt UVa+UVb :This 75 watt heat emitter bulb is the perfect 24 hour heat source for chicks/ reptiles/parrots and other hand raised birds. This bulb screws into a standard porcelain incandescent socket, giving off intense light. UVA UVB has the effect of bactericidal, and stimulates appetite of your young pets. It forms a comfortable area for heat where young pets can rest and relax. In addition to poultry, parrots and other birds it can be used for aquatic turtles, snakes, lizards, spiders, frogs, mammals and other reptiles and amphibians.
Color
Silver
Wattage
75W
Voltage
220V
Socket
E27
Size(approx.)
5x5x5cm
Suitable for box dimensions
50 cm long 40 cm deep 40 cm high.
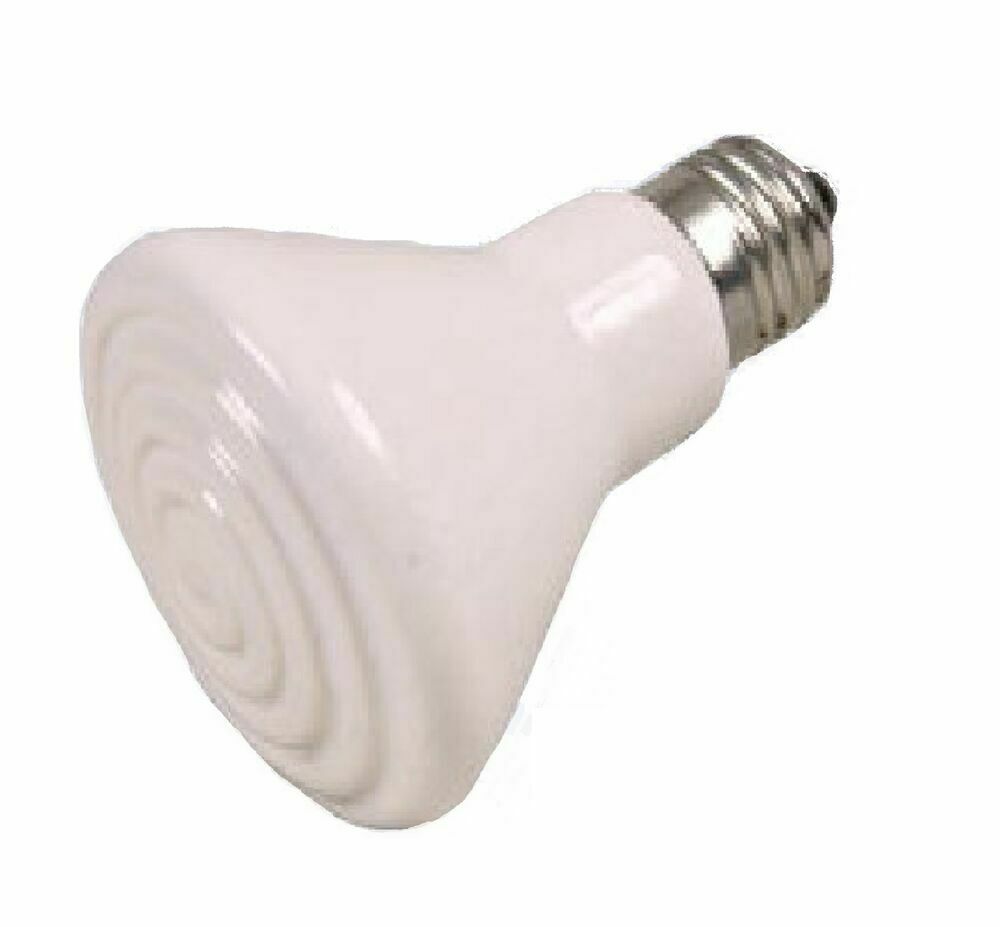
3) Ceramic heating lamp.
Feature:
100% Brand New
Material: Ceramic + Alloy
Color: Black
Diameter of heating surface: 8cm
Height: 10cm
Wattage: 150 Watt
Voltage: 220-240V
Heating source: Ceramic, infrared, electrical, no light emitted
Tolerates high temperatures from reptile heat or bulbs
Tough ceramic sockets won’t break down in heat stress
The black exterior finish is powder coated and fired for added luster and long life
The bulb is made from glass containing rare earth black phosphors, which simulates the moon’s natural glow for nocturnal viewing without disturbing the reptile’s day/night cycle
Raising Chicks/parrots : Chick/ parrots Brooder Temperature and Light Requirements
Raising chicks can be a fun experience for children and adults alike, but it’s crucial that chick brooder environments be set up correctly. Here are the brooder temperature and light requirements you need to know.
Brooder Temperature : A chick’s body has little in the way of temperature control, although a group of chicks can keep themselves warm by huddling together in a small space —When given sufficient space to exercise, eat, and drink, chicks need an external source of warmth while their down gives way to feathers, starting at about 20 days of age.
Start the brooder temperature at approximately (35°C) and reduce it approximately (3°C) each week until the brooder temperature is the same as ambient temperature. Within the chicks’ comfort zone, the more quickly you reduce the heat level, the more quickly the chicks will feather out. The dimmer switch enables you to reduce heat/light inside brooder with out altering the height of UVA+UVB bulb and ceramic heating lamp.
Turn on the brooder at least 1 hour before placing the chicks in the brooder area. A trick, I use is, to keep my hand warm in my pocket for a few minutes, then place it on the floor immediately under the centre of the brooder. You should feel a mild warmth on the back of your hand which equates roughly to 35 degrees radiant heat temperature on the chicks.
Let the chicks settle for an hour or so and then check to see how they are settling. The chicks should look comfortable and be evenly distributed across the brooder area. if the chicks huddle together then increase the temperature as the chicks are cold. If they are all round the outside of the box then decrease temperature as they are too hot. If they are all on one side of the brooder area this usually indicates a draft.
Brooder Light : Chicks are attracted more to light than to heat, which is why commercial brooders have a small light, appropriately called an attraction light, near the heat source. One 75-watt bulb will adequately light about storage box 50 cm long x. To help chicks find feed and water, light the brooder continuously for the first 48 hours. If the brooder gets natural daylight, after the first 2 days you can turn the light off during the day. Windows on the south side furnish the best sunlight.
Even if the light is also your source of heat, turn it off for half an hour during each 24-hour period — but obviously not during the coolest hours — so the chicks learn not to panic later when the lights go out at night or in the event of a power failure. Putting the brooder light on a timer will save you the trouble of remembering to turn it off and on each day.
Light affects the growth rate of chicks, so never keep them in the dark. Even if you have to dim the lights to control cannibalism, the light should still be bright enough for you to see what’s going on in the brooder. A rule of thumb is that dimmed lighting should be at least bright enough to barely read a newspaper.
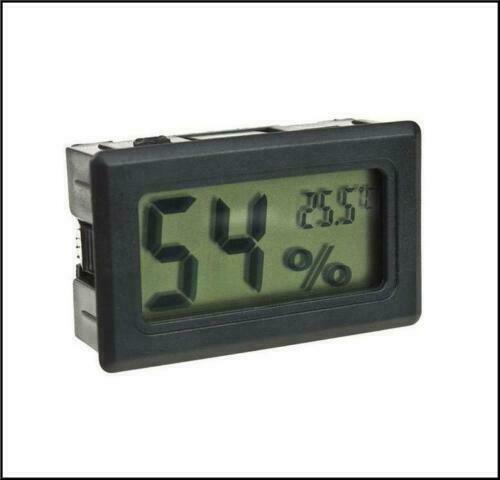
3) Digital Thermometer:
Product Type:
Thermometers
Measurements:
Hygrometer/Humidity, Temperature
MPN:
Does Not Apply
Display:
Digital
Brand:
Unbranded
Modified Item:
No
Custom Bundle:
No
Material:
Plastic/Resin
UPC:
Does not apply
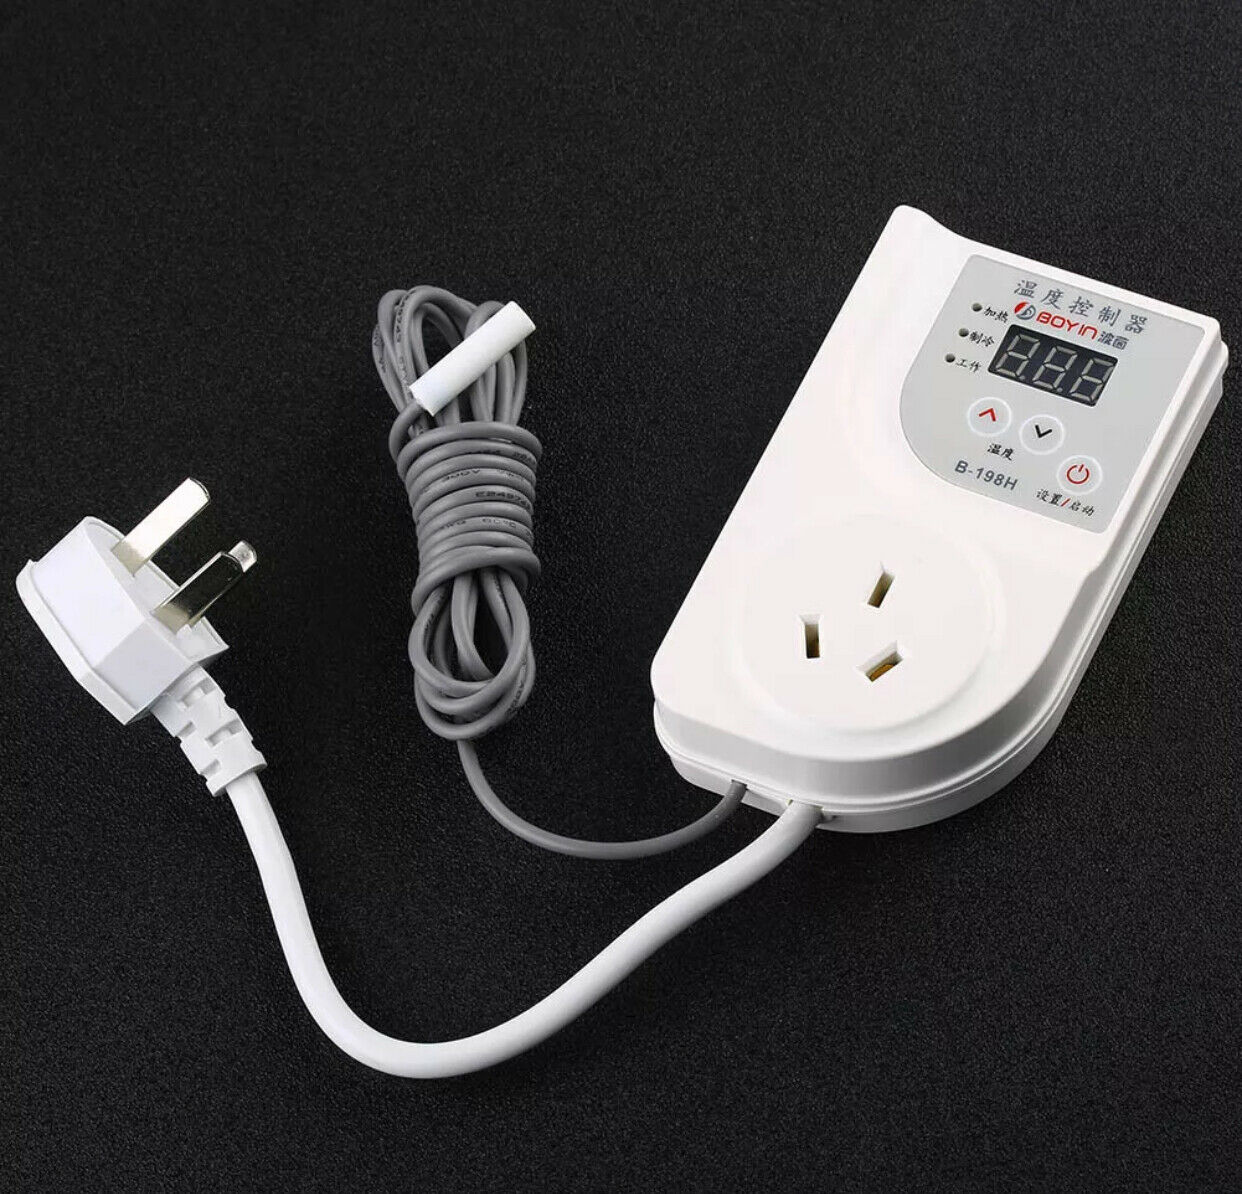
4) Thermostat.
Descriptions:
The controller is connected to the power supply, Yellow light on the panel indicates the heating mode, the green light indicates the cooling mode, red light means that the heating or refrigeration operation, red light means that the current temperature has reached the set temperature requirements.
Operation.
Press down the on/off button for few seconds , it will start flashing , Now you can set the temperature using up/down arrow. Then press on/off button again. The desired temperature has been set, the temperature which is on display is the current temperature. You can place probe in the brooder at the level of chicks head. Now turn the heat and light lamp on. As the temperature will start rising the temperature on thermostat display will change accordingly. Once temperature inside brooder reaches the desired level, thermostat will cut of the electricity supply to heating lamp and bulb. It will turn on the supply when temperature drops below the required temperature.
Specification: Power: 50Hz AC220V The maximum load power: 2000W Temperature control working temperature: 0 ~40℃ Temperature measurement range: -35 ~55℃ Refrigeration temperature control range: -30 ~38℃ Thermal control range: +5 ~45℃ Return difference temperature: ±1℃ Temperature accuracy: ±1℃ Sensor exchange accuracy: R:10KΩ±1% , B:3470 ± 1% Probe length 2.5 meters Material: plastic
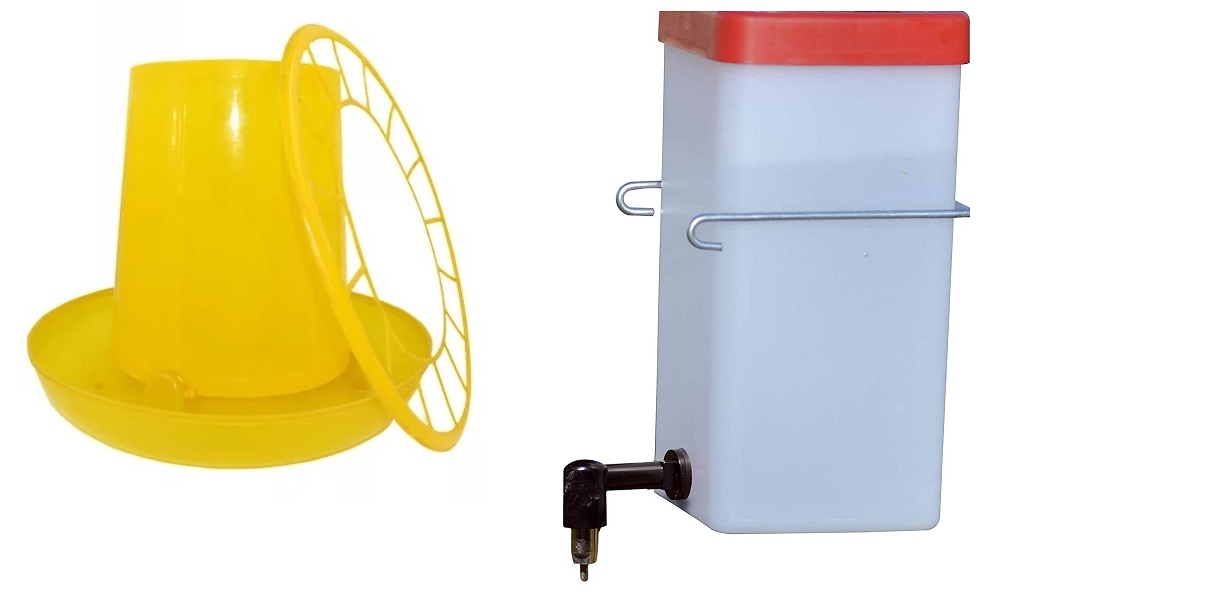
5) Feeder and Drinker.
Food should be given to the chicks soon after the water. Though the yolk sack provides sufficient food for the chicks ensure that chicks are eating as soon as they are in the brooder. The sooner the chick eats the sooner it grows. Chicks are usually started with food by using chick crumbs sprinkled on a the paper.
We ship purchased goods with in to days after payment is made. Goods are delivered with in 2-3 business days , however deliveries to some areas can take longer.
Related products
-
-
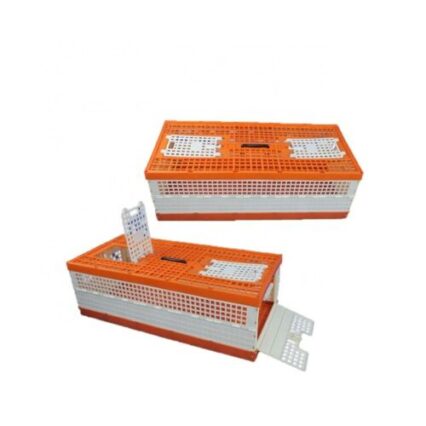
2 Pigeon Transport Baskets
$185.00 -

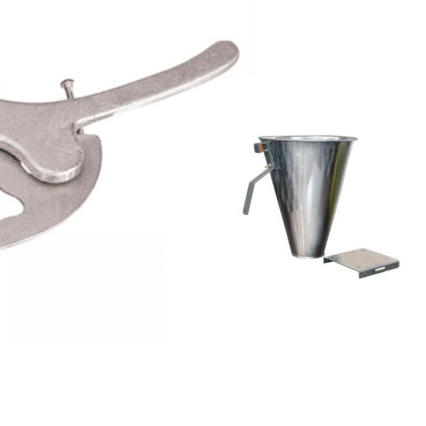
Human Poultry Dispatcher
$55.00 -

Brooder Kit : UVA+UVB Bulb
$55.00